Thursday, May 2, 2013

She's almost ONE?

Good Grief!! I have been so busy (I started baby-sitting a 3 month old) having two little ones is pure, wonderful, chaos! BUT..I am back and here to show some of the things I have been working on! I started this 30 pins in 30 days and I am here to finish..it may not be 30 consecutive days...but I will do 30 pinterest projects!! I have 10 left and I have some ideas that I am excited to share!! So for today, I decided to show off some things I have been working on for my daughters 1st birthday, only 2 months away. I have been having a hard time with this, although I love nothing more than to watch her grow and explore (or destroy rather) the world around her (she has earned the name "Princess Hurricane") I wish that I could slow the process down. I was telling my husband about this and he brought to my attention that in the 10 months of her little life I have probably missed LESS than 24 hours!!  HE'S RIGHT! I have gotten to see everything I possibly could and you know what? I am just going to enjoy the ride! :)

Ok, enough personal things!! Here is her party so far!! The first thing was an idea found on pinterest (I saw the "tree" guest book, like this one)

and decided, Hey!! Her theme is cupcakes, I will have people add a "sprinkle" to her cupcake, I think this will be really cute for her scrapbook, and a great way for her to see all the people that love her! :)
 
The little fold-y card says "Thank-You for coming, please add one sprinkle to Adalyn's cupcake!"Jeremy and I will add ours early so guests understand what they are supposed to do.
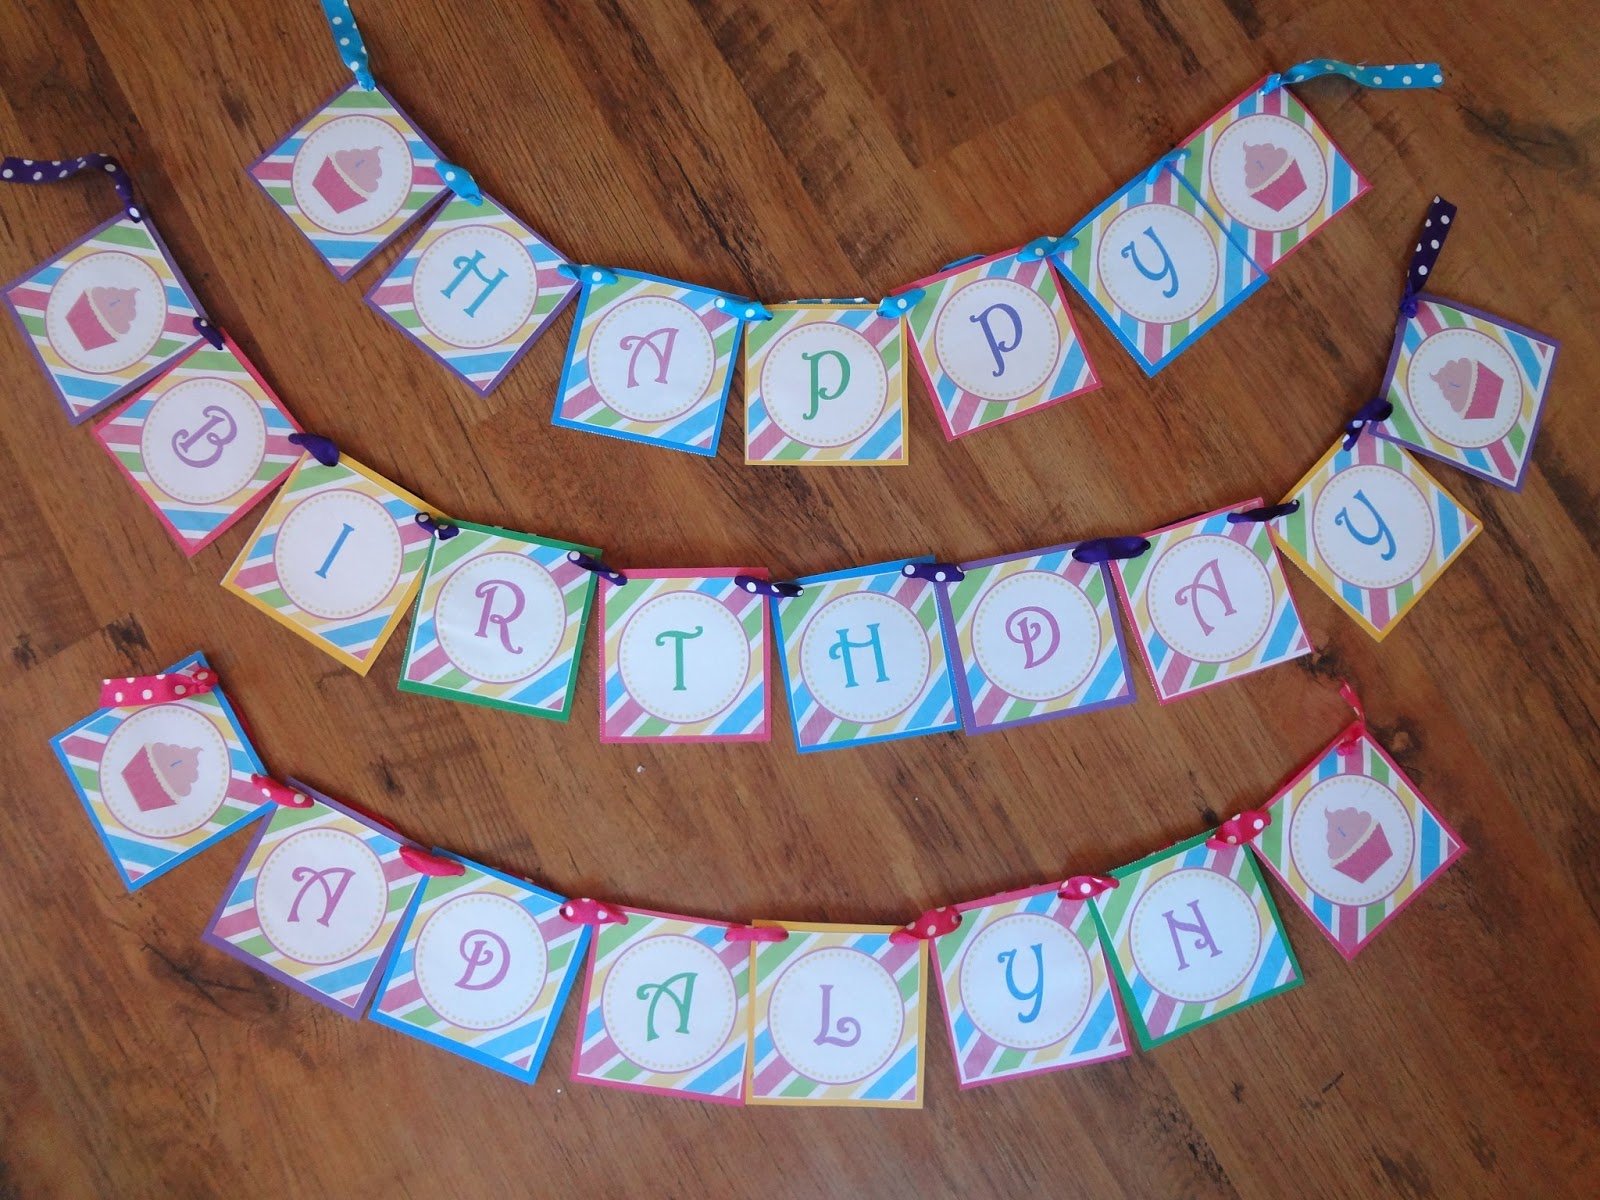
I then decided to make her a couple banners, one for around the tray of her high chair, and another to hang somewhere. The first one was a free printable that I added scrapbook paper for a border/backing  and glued it on some ribbon to hang.
The second Banner was a free "frame" I found on a google search, I opened it in paint and printed each letter I needed (time consuming, but FREE) I backed these ones in scrapbook paper as well, punched holes in them and strung them on ribbon!
I also took plastic ware and wrapped it in cupcake theme napkins, secured with scrapbook paper and a smaller version of this frame that says "Adalyn's One" ..Also time consuming. Also FREE!!


Tuesday, April 2, 2013

GLUTEN FREE Mozzerella Sticks! Yumm

Gluten Free Mozzerella Sticks, Day #20!
 Day 20, I am 1/3 of the way through! Today I'll share a pinterest recipie I found..I was looking for a batter, but found these and they looked easy enough. I made them with gluten-free products (because there is no such thing as a gluten free mozzerella stick) You can make them with your "regular" products as well and they would be much better for you than the frozen ones you buy.

You will need:
 8 mozzerella (or your favorite cheese) sticks..any brand will do.
 2 eggs
 3/4 cup brad crums
 1tbs ittilian seasoning
 2 tbs parm. cheese

Cut your cheese sticks in half and FREEZE them, solid..this will help you to be able to cook the outside until its crispy, beofore you have a puddle of cheese!

Dip frozen cheese into egg, then into crumb mixture. Bake at 350 until they are crispy (I did mine about 7 min.)


Friday, March 29, 2013

Easter Eggs..or...Easter Globs!! ..YUMMY!!

I know, I know...I am slacking!! This is yesterdays Pin, I started it yesterday, THEN realized it was a 2 day project so here is yesterdays...todays will follow. Anyway. Its just a few days before Easter so..I decided to tackle and concour easter eggs. HAH!! It was an experiance..They taste WONDERFUL, but...they do not resemble an egg..at all. There was a wonderful tuditorial on how to make your own easte egg molds..but I dont have time for all that nonsence, when I decide I want something...that means I wanted it 5 minutes ago!

RECIPIE:
 8oz cream cheese
1 cup peanut butter
1lbs powder sugar
1tsp vanilla
Mix togetherm form egg shape (or use a cookie scoop and hope for the best!!
Chill in fridge overnight, cover in melted chocolate, chill until chocolate is hard, ENJOY!!

My Hubbay says these are really rich..make them small...just eat one...blah blah blah, I could eat 6 and if I had a much higher metabolism..I would do just that!

Wednesday, March 27, 2013

Christmas Countdown

YEP! I am counting down already..don't get me wrong I REALLY enjoy all holidays but Christmas is absolutely my favorite. I love the exctement of wrapping and giving gifts, I love all the lights, the festivities such as baking, parties and shopping. I love that stores play Christmas music....I am the crazy person that when the Christmas items come out in Novemeber...I don't mind a bit!! I love everything about the Christmas season and so therefore, here I am...4 days before Easter...completeing a Christmas pin!! This was super simple its a cookie sheet from the dollar tree and some scrapbooking supplies! TAA DAA!! A Christmas countdown, I think it will be great in my kitchen this year! I want my house to oooze Christmas, my hubby says thats wonderful but I HAVE to wait until the turkey is cold to start celebrating, last year I decorated the house on November 15th (My birthday) we will see how long I make it this year!!

Tuesday, March 26, 2013

Day 17, More sweet feet!!

Day 17, After yesterdays "Sweet Feet" post, I couldn't help but do another one with her little feet! So, We made a fathers day card! Jer works at a John Deere dealership so this is so fitting! When I first saw this one on pinterest I figured I would stash it away in my head for if a little boy comes along someday..but then I figured Jer will love it just as much from his little princess!!  It was simple to make...I am no artist, so I made very simple lines, hopefully he understands that its a tractor!! lol I think it turned out really cute though!!!


Sweet Feet

This idea is one that I have seen many versions of on pinterest "Thats cute" but I never actually did it. I had a friend post it on my facebook wall and decided...that would be so cute if I added a picture and....my creative jusices started over flowing!! I started with my little ones foot prints, RIGHT BEFORE BATH TIME!! She wanted to squuze the paint between her toes (she liked the texture I guess) I added the "body" and "face" to the butterfly, and a photo of her that I love, and a few vellum accents from my scrabooking supplies, I took down my CHRISTMAS (yes in MARCH) display and hung this one up for spring/summer. I am happy with the turn out! :)

**I AM aware that the picture quality here is awful!!

Day 15!! HALF WAY!

Half way through my pinning adventure! For todays I decided to try homeade modge podge (I do have/use the real thing) But..I htough making it might save me a mney if it really works as well as the pin says and guess what?? IT DOES!! :) I used this recipie:

MODGE PODGE:
-1 1/2 Cup Flour
-1/4 Cup of Granulated Sugar
-1 Tsp Oil (any kind)
-1 1/4 Cup Water
- Empty Jar (w/air tight lid)

- Slowly mix all the ingredients together over low heat.
 Combine the ingredients until they are well mixed, if it gets too thick add more water. Make sure the water doesn't boil, or the mixture will get very clumpy. If you want a higher varnish, add more oil.
-Pour mixture into jar (with lid) and store at room tempurature.

I used this for a puzlze Jeremy put together. (Started with the back to test it) Its not quite as shiney as my real modge podge (maybe I should have added more oil?) but..It did the trick..here is the puzzle all glued together, I just need to grab  alarge frame so we can hang it up.