Tuesday, March 26, 2013

Cards!

Day 14, two weeks in!! Today I did nt have much time...or access to lots of supplies so..I decided to make a couple cards that I seen on pinterest, I have tons more I would like to make but..these are the ones I did so far. One is for a wedding or bridal shower and the other for a birthday..I think it will be for Adalyn since hubby and I decided on cupcakes for her 1st birthday party theme. Here they are!!
 

Friday, March 22, 2013

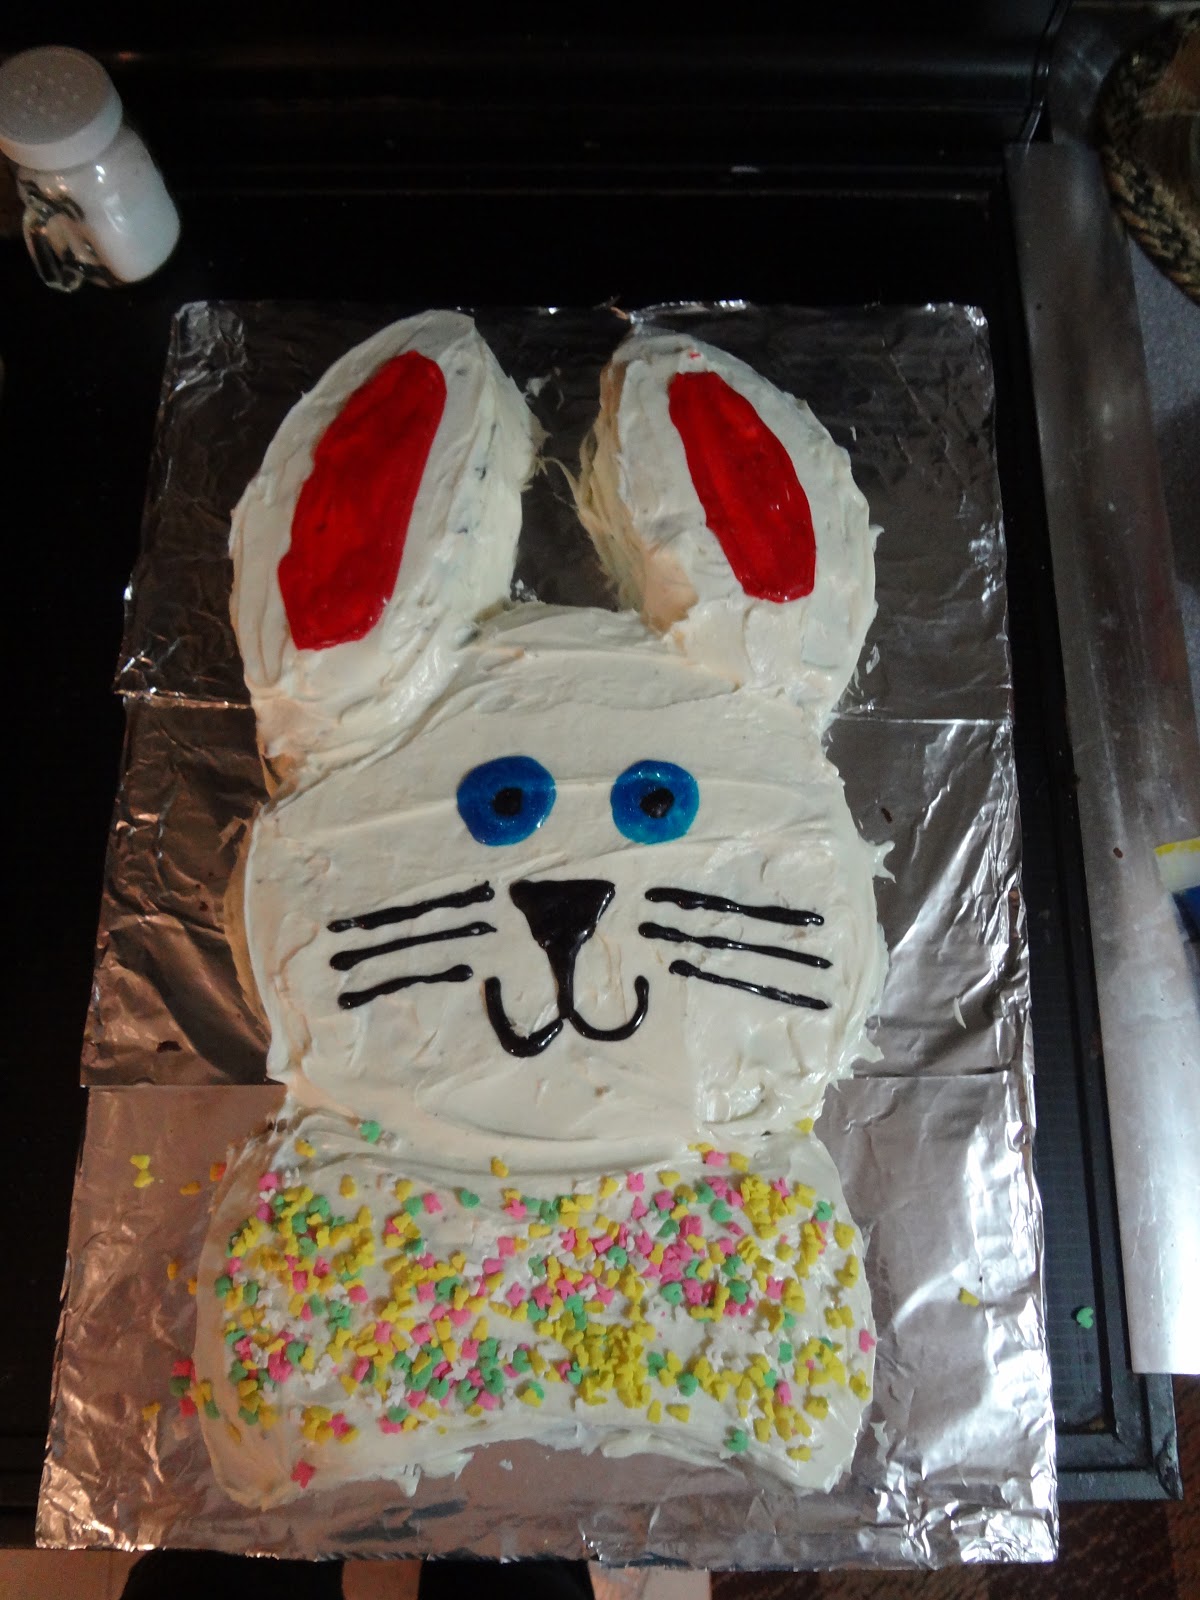
Bunny Cake

Day 13, This one.....I am not so sure about! lol, but its the pin for the day! I made an easter cake...and easyer BUNNY cake. It did not turn out as beautiful as I had planned in my head, but its cute enough and the kids will get a kick out of it. :)

I started with two round cakes and cut ONE like this..


Next, place the peices on a large flat surface like this...sorry its sideways!


Then...decorate him up!! I would suggest using a tip..but once again my tips are MIA, I know I put them SOMEWHERE that I would not loose them, so they are not lost...just in a safe spot. :/ Anyway, here he is!
 

Thursday, March 21, 2013

Pretty up those blocks!!

Day 12!! This one took some TIME...But, The outcome is very cute!! I bought blocks when I was pregnant, for this photo....
A close freind helped me carefully balance them on my belly...a few times because I was laughing...and then, I put the blocks away and they have not been seen since!
 
UNTIL, I saw somehting on pinterest!!! BLOCKS that were redone! I quickly set to work..I gathered my supplies (blocks, paint, paper, modge podge and paint brushes. 
Then, I began to paint the basic colors into pretty, girly colors...This was extreemly time consuming and I did end up with some paint on the wood on a few blocks :(
After all the bocks were painted, I modged pogded scrapbook paper to ALL the blocks...this took FOREVER, be sure to put modge modge first on the block, then the paper, and then another layer of modhe podge to seal it.
Here is the finished product....
I am happy with the outcome..for playing with, some of them do have wrinkles and smeared paint (whoopsie!) so I would not give them as a gift..but they are cute enough for my little one to play with at home!

Wednesday, March 20, 2013

Watermark Shirt

Day #11
 Todays pin took a little time but was so worth it! I forgot to take pics of each step..if you are a visual learner you can see the origional blog post here > http://www.u-createcrafts.com/2011/08/creative-guest-watermark-tee-by-sweet.html She has a great tuditorial!! The shirt REALLY does work! I was so impressed when it came out!
1.) Get yourself a white shirt
2.) wet it with cool water, and write on it with Elmers GEL glue (white school glue, will just run all over the place and soak into the shirt
3.) wait for it to dry (the worst part)
4.) use your favorite dye (I used RIT liquid) and dye the shirt your color of choice
5.) ..let dry.. AGAIN!
6.) Wash and dry as normal, heres MINE!!

Tuesday, March 19, 2013

Cinderella: Proof that a pair of shoes can change your life!

Day 10. Soo... I know that this is not a crafty post, but it DID start as a pin!! I have a "style" board a mile long, so I am working on (slowly) purchasing things that complete my wardrobe. I usually treat myself to summer shoes, for the most part they happen to be flip flops from t.j maxx or ross...cute...but I get about one summer out of them and they are toast. I wanted something that was a shoe, not a sneaker. (socks in the summer? NO.) I finally settled on the "boat shoe" and what better than sperrys? I tossed the idea around added them to my "I want them, I love them, but I don't want to pay for them" list. (Also a mile long list) Well, income tax time came and Jer said that he would give me a chunk of the return and I was to buy MYSELF stuff (ME?? You mean NO baby clothes??) I spent weeks making lists, researching (I do know how nerdy that sounds) and finally decided on the items I would buy. One of those items were.....taaaaa daaaa. Sperrys! The pair that I has been drooling over. Tan with cheetah accents. I was in love and today when my mail man brought them...I could hardly wait to get them on my feet. They are comfy, cute, and best of all....I can chase my princesss at the park with them on! NOW!!! I have to tell you one more thing about them. They are $90.00 shoes BUT I am always looking for a deal, I found them on amazon.com for 78.10 and free shipping, but I was determined to do better. I stumbled across them on the peebles website, signed up for e-mails (got a coupon) and ordered them when shoes were on sale soooooo, I was able to score them for $60. WHOOT WHOOT!! 

Monday, March 18, 2013

Hoppity-Hop!

Day # 9!! Pinterest is FULL of Easter basket ideas that are not candy/junk food, so I thought I would share Adalyn's easter basket! Her easter basket has NO candy. (She is only 9 months old!) I wanted to get her an easter basket...mostly so I can take pictures and do a scrapbook page, because she is not old enough to understand the concept. Although she is only 9 months, these ideas could most certainly be used for older kids as well!
Her Eatser basket includes:
 
   A lace petti romper
   The Lorax, By Dr. Seuss
   Llama Llama Hoppity-Hop
  Gerber puffs
  A teether
  A couple hair prettys (made by her Momma!)
  Sunglasses
  Pink (toe) nail polish (for her sweet little toes this summer)
  A baby bracelet (again, made by her Momma)


I think I will also get her a plastic "lawn chair" ($5 at walmart) for this summer and her basket will sit on it! She is so fun to shop for at this age...she wont complain about ANY of the things I chose for her!

Sunday, March 17, 2013

Who needs cake? I have a SPOON!

Day 8! I am trucking right along in my 30 days of pins, Today's pin....Homemade chocolate buttercream frosting (yeah, its as good as it sounds!!) The frosting was simple to make and tastes amazing....like a melted chocolate bar on your cupcake!
**please excuse my rough frosting skills, my tip is MIA**
I added a chocolate drizzle and hersheys square to disguise that!!
 
Anyway...here is the recipe, a pinterest KEEPER!!
 
1 cup unsalted butter, room temp (NOT melted)
2 1/2 cups powdered sugar
4 Hersheys milk chocolate bars (chopped and melted)
1/4 cup heavy cream
1/2 tsp. vanilla extract
 1.) Cream together your butter and sugar. 2.) Add heavy cream and vanilla 3..) Add melted chocolate (needs to be cooled to room temp. but still liquid, this will make sence while you are making it!) 4.) once it is well mixed, spread/pipe and enjoy!! :)